Creating Your First Automated Test Flow with TestCart
Table of Contents
Introduction
Welcome to TestCart, your reliable Shopify companion for ensuring seamless online store performance. This comprehensive guide will walk you through the process of creating your first automated test flow using the TestCart Recorder. Follow these user-friendly steps to enhance the reliability of your online store.
Overview of TestCart Recorder
TestCart Recorder, an intuitive Chrome extension, empowers you to effortlessly record and upload test flows to your TestCart app. It guarantees thorough testing of your online store's functionalities.
Recording Your Test Flow
Step 1: Install TestCart Recorder Chrome Extension
Begin by installing the TestCart.io Recorder Chrome extension. This free extension simplifies the process of recording test flows. For optimal results, record tests in an incognito window by enabling "Allow in incognito" in the extension settings.
Install TestCart RecorderStep 2: Recording Your First Flow
- Open a new browser tab and navigate to the page on your online store where you want to start recording.
- While recording, follow best practices such as recording in an incognito window and focusing on smaller, individual tests for resilience.
- Launch the TestCart Recorder extension, enter a descriptive test flow name, and click the "Start recording" button.
- This will take you to a new incognito window. Allow the page to load and start testing.
- When satisfied with the flow, simply click on the TestCart Recorder extension in the same browser.
- Click the "Stop recording" button to conclude the recording process.
Click on the 'TestCart' browser extension
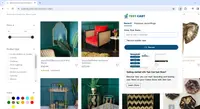
Enter the flow name and click on “Record”
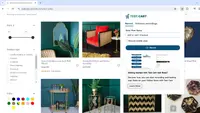
Recording test flow will start in an incognito window.
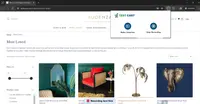
Click on “Make Assertion” to assert the required values. After completion of the test flow, click on “Stop Recording”
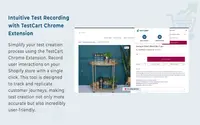
Example test flow
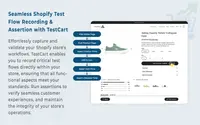
Click on the 'TestCart' browser extension again. Click on “Previous Recording”. The recorded test flow is listed.
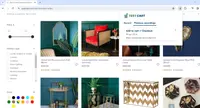
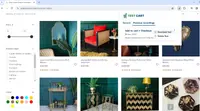
Click on “Download test” to download the recorded test flow. Click on “Delete flow” to delete the test flow.
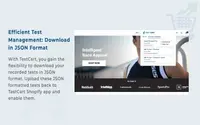
The test flow recorded is in JSON format.
Step 3: Uploading Test Flow to TestCart Shopify App
- After stopping the recording, view your recorded test flows.
- Click the "Download" link next to the test flow you just recorded to save it to your computer.
- Navigate to the Testing Flows tab in your TestCart app, click "Add test flow," and upload the downloaded test flow file.
- The test will be queued and run on your online store, with updates visible after a few minutes.
Navigate to the “Test Cart” App in Shopify. Click on “New test” to add the recorded test.

Enter the flow name and click on the upload script to add the recorded test flow.

After uploading the recording, click on “Create test”

The test will be created, and an automated test will run after X hour as per the selected plan

To run the test manually, you can click on test flow and then click on Run Test

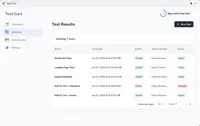
Test Results

Example Test Flow and Test Results
The dashboard displays store metrics and test monitor

Frequently Asked Questions
For comprehensive testing coverage, consider recording tests such as Home > Collection page, Collection page > Quick add to cart, and Product page > Add to cart > Checkout. Explore more test flow ideas in this blog post.
Test flows run whenever you update your online store theme, including changes made via Shopify admin editor, code pushes, or third-party app installations. Default frequency is every 24 hours.
If a test fails, receive an email alert (and Slack notification if connected) with debugging information. Assess the screenshot, review advanced debugging information, test the flow live, and re-record if necessary.
No, automated test flows do not impact store analytics or performance. Events to Google Analytics, Shopify Analytics, and Amplitude are blocked during testing.